REALBasic Application Development - Part 2
30 December 2024
Introduction
This is part two of the tutorial for building a Macintosh application with REALBasic. In this tutorial we will be adding more user interactivity to the example application, and learning how to create and write to a file.
See part one of the tutorial here.
Download the project assets and completed project code below:
User Interactivity
After building an application in the previous guide, it's time to add some more complex user interactivity. To do this we first need to define some constants. Constants are variables (stored values) hold a value that we can define, and will not change. They will always remain the same and we can reuse them within the application. A good way to manage this sort of data is by creating a module. Create a new module from the File menu, and then select it from the project window and rename it to "Globals" (within the properties panel).


Open the Globals module and you will see three groups in the left panel (Constants, Methods and Properties).

Constants, Methods & Properties
Constants are typically used for defining values that won't change, and can contain different values based on the build platform/language. A constant can be of type String (text), Integer (number), Double (decimal value), or Boolean (true/false).
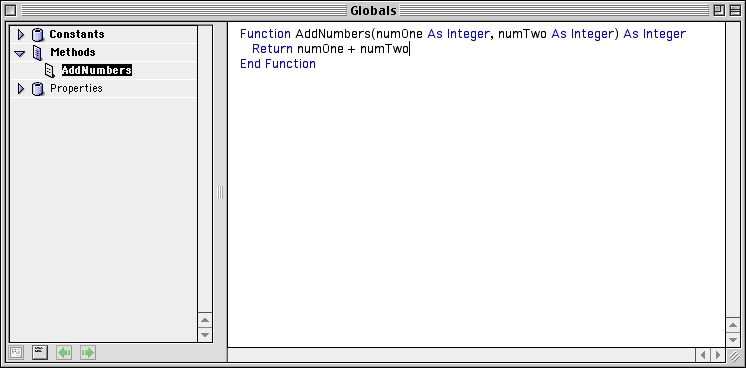
Methods are functions that can take parameters (optional) and return a value (optional). Methods can be defined within and scoped to individual windows, or within a module so they can be accessed anywhere within the application. When creating a method you will be asked to provide parameters and a return type. These are optional, but in the case of the example function below, it takes in two numbers and returns a number. This method/function can be invoked anywhere within the application like this: AddNumbers(32, 173). This will return the sum of both numbers that are passed as parameters.

Properties are similar to constants, but they can be re-written to and changed at any point. For example you may have a property named UserName, which takes a String value. This property will initially be undefined before the user sets their username in an application, and once they've set it then you would reassign UserName to the user's input (e.g. UserName = EditField1.Text). You could then save this property to a preferences file, and when the application is re-launched you can load it and assign the property to the saved value when the application starts.
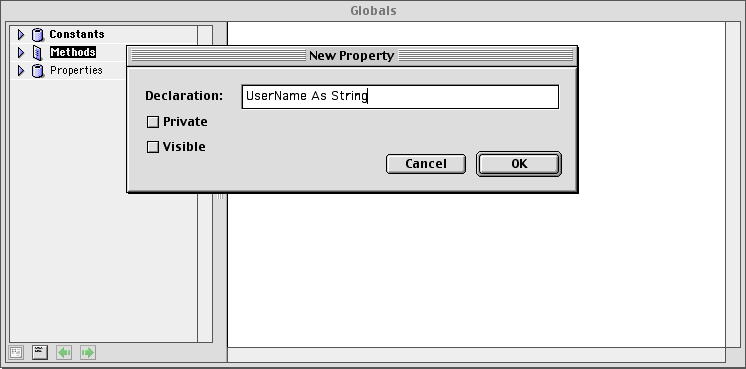
Now we need to create a constant from the Edit menu, or by pressing "Command + Option + c". Name the constant `SecretAnimal` with a type of "String", and set the value to an animal name. Add another one called `SecretFood` and assign it to a food name.

Now Add another constant called `SecretNumber` of type Integer, and assign it a number.

Creating a function
We are going to add user controls to the application, so that when the user clicks on a control it reveals the value of either the SecretAnimal, SecretFood, or SecretNumber.
To do this we need a function that takes in a messageType and returns the value of the constants we defined.
Create a method within the Edit menu, or by pressing "Command + Option + m". Name the method RevealMessage. It should take one parameter (messageType) that is of type String. The method should also return a String.

To allow a user to trigger this function we need to add it to an event on a user control. When the function is called, we need to pass the messageType parameter.
We will create three checkbox controls that will reveal the secret value when a checkbox is checked. Since we will require three checkboxes to reveal the value of each constant that we set, we will need to provide three different messageTypes so we can identify which checkbox was clicked.
Within the RevealMessage function, add the following:
If messageType = "animal" Then
  Return SecretAnimal
ElseIf messageType = "food" Then
  Return SecretFood
ElseIf messageType = "number" Then
  // SecretNumber must be converted to a string with Str() so we can display it within the application
  Return Str(SecretNumber)
Else
  Return "Invalid Option"
End If
Within the function we have defined the three different messageTypes, these are the only valid input parameters the function will accept. Now that the function is setup we can call the function on each checkbox input's Action event and provide the corresponding messageType.

Within the application window, add three checkbox controls, and rename them to "Animal", "Food", and "Number" in the properties panel.

Now open the code editor for the "Animal" checkbox by double clicking on it. Within the "Action" event, add the following code:
If Me.Value = True Then
  Me.Caption = RevealMessage("animal")
Else
  Me.Caption = "Animal"
End If
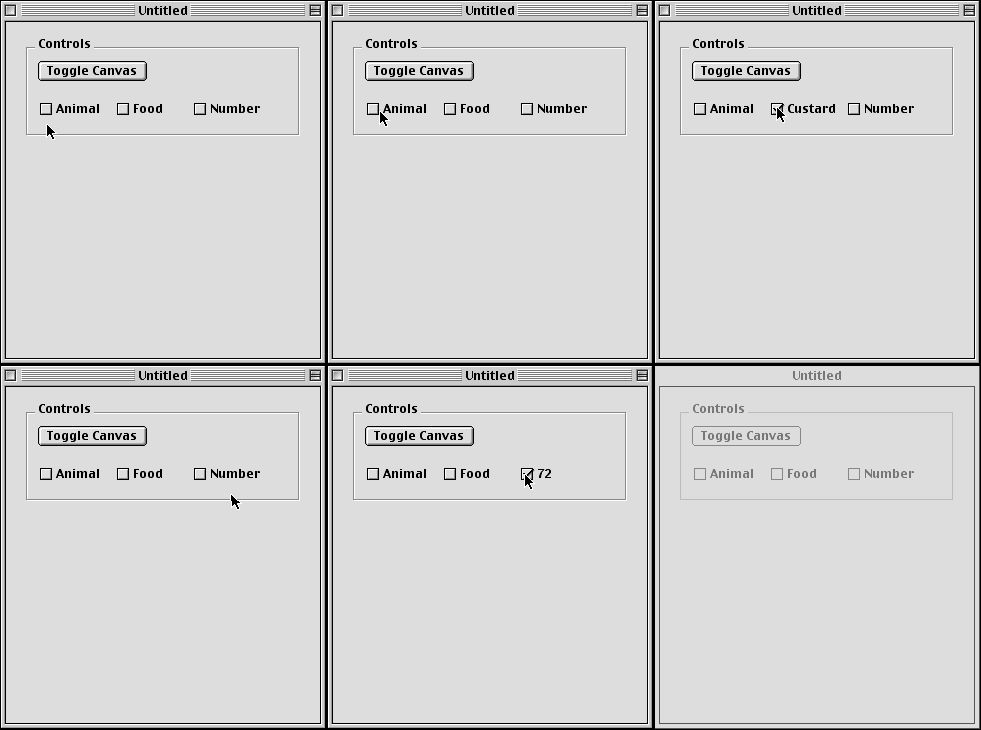
Now whenever the checkbox is clicked, If it's checked (Me.Value = True) then we set the checkbox's caption to the value of SecretAnimal by running the RevealMessage function. If the checkbox is unchecked then we restore the caption back to "Animal".

Now do the same for the "Food" and "Number" checkboxes.
Input & Output
Now we're going to add a text box where the user can enter text into the application and save it to a file on their computer. Drag an EditField control into your main application window and resize it to match your user interface. Select the EditField and then within the Properties panel and rename it to "AppTextInput", then set the "MultiLine" Appearance property to checked. This will allow text to wrap onto new lines when it exceeds the width of the EditField.
Add two PushButtons underneath the EditField and label them "Clear" and "Save Text". You can set the default button by selecting it, and enabling the "Default" property within the properties panel.

Saving Functionality
Now we need to implement the saving functionality. Double click the Save Text button to bring up it's Code Editor. We want to edit the button's Action event so that it saves the EditField's contents to a file.
Within the editor we first need to define a variable named fileStream which will act as a reference to the file that will be created.
Next we need to define a variable fileWriter, which is of type TextOutputStream. TextOutputStream provides methods to write strings and other data in a structured way. We will use this to write text data to a file.
We also need to provide a filename when creating the file, so a fileName variable should also be defined.
Write the following code into the Action event of the "Save Text" button.
Dim fileStream As FolderItem
Dim fileWriter As TextOutputStream
Dim fileName As String

fileName = "Text File.txt"

// Use the built-in GetSaveFolderItem function to prompt the user for a destination for the file
fileStream = GetSaveFolderItem("Text Files (*.txt)|*.txt|All Files (*.*)|*.*", fileName)

// Check that the destination is valid
If fileStream <> Nil Then
  // If the user selects a destination, create the text file
  fileWriter = fileStream.CreateTextFile

  // Write the contents of the EditField to the file
  fileWriter.Write(AppTextInput.Text)

  // Close the fileWriter
  fileWriter.Close()
End If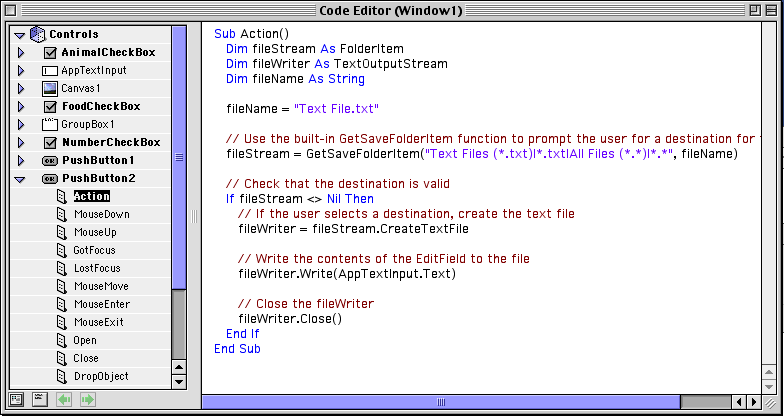
Close the editor and now open the code editor for the "Clear" button and select the Action event. To reset the EditField we just need to assign it's text value to an empty string ("").
AppTextInput.Text = ""
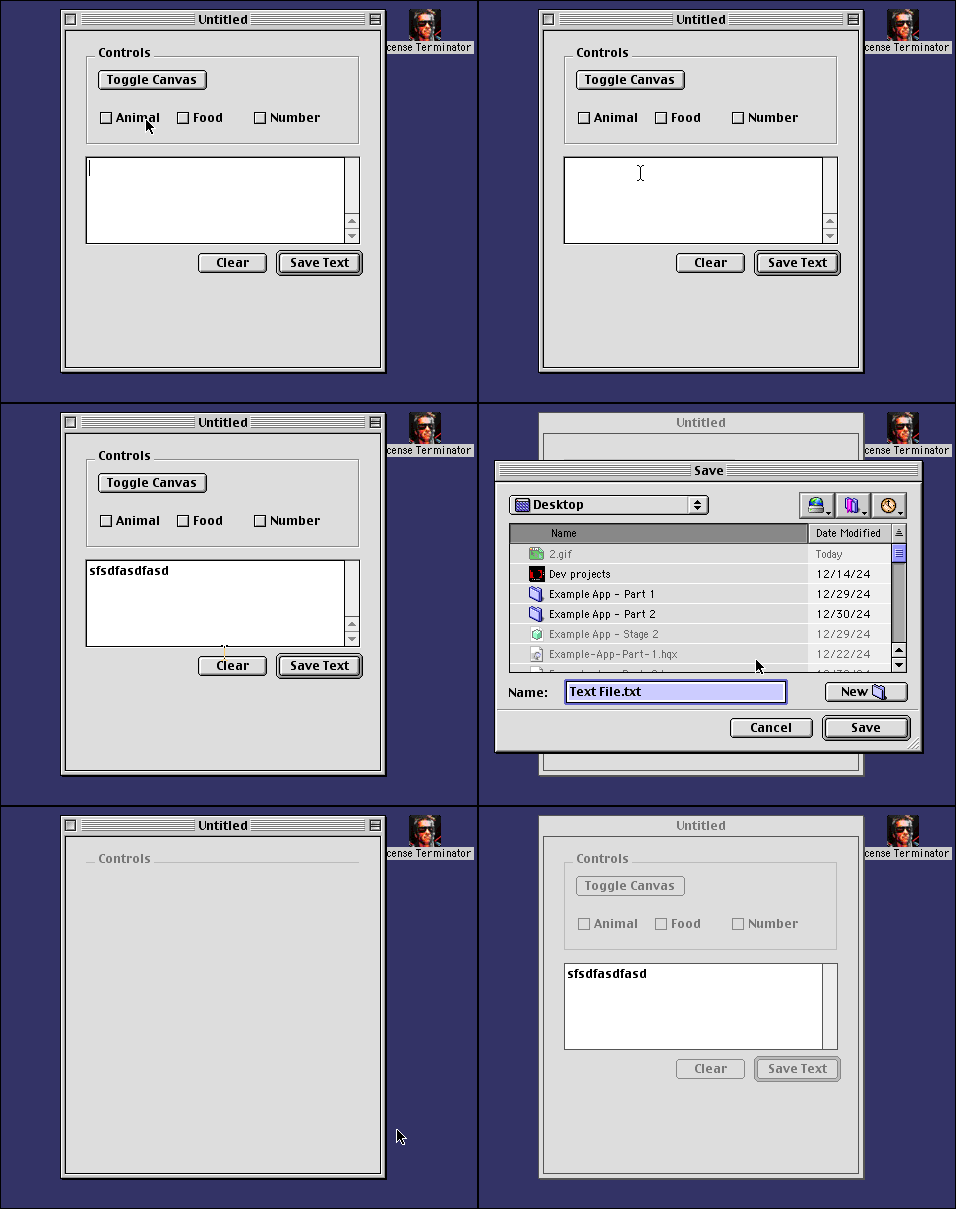
Now build your application and try adding some text, and then saving it to a file.
Related Pages

|
REALBasic Application Development - Part 1Learn how to build a simple Macintosh application using REALBasic. |

|
An Introduction to REALBasicAn introduction to REALBasic, a toolset for software development on classic Macintosh systems. |

Post a Comment